Experiments
Listing experiments
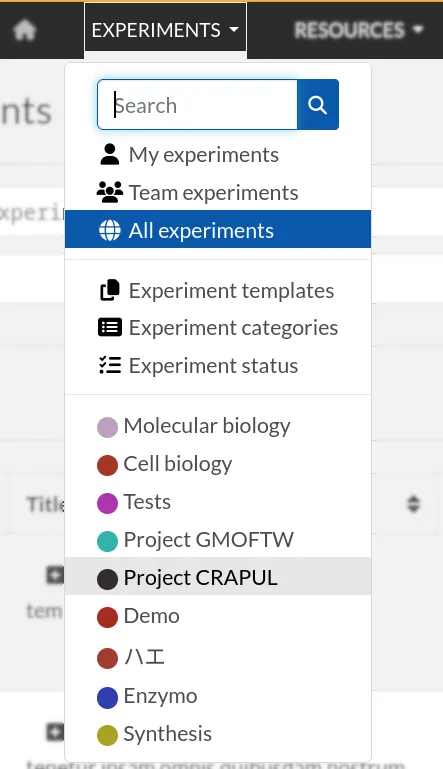
Experiment entries are the core of the eLabFTW lab notebook. Select "Experiments" from the menu bar at the top of the page to access the Experiments index.

This menu contains several entries for listing Experiments with different Scopes, by Category or accessing Templates, Experiments Categories or Experiments Status.
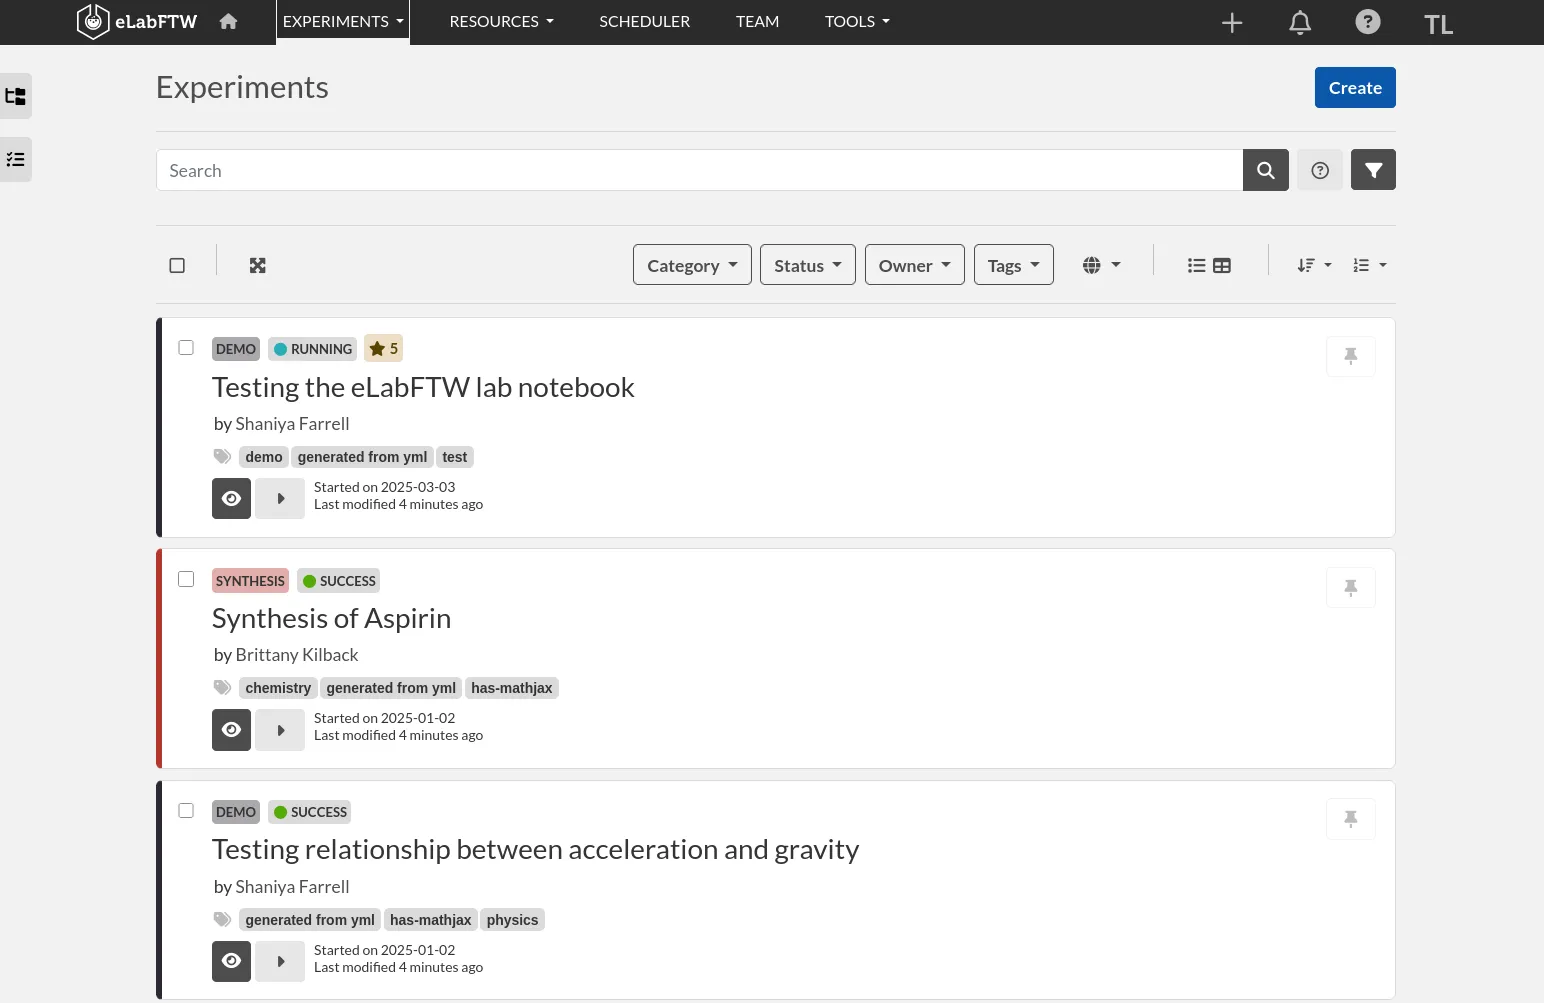
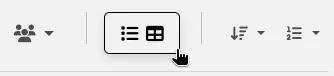
You can change the page layout by clicking the Layout button on the top right of the experiments list:
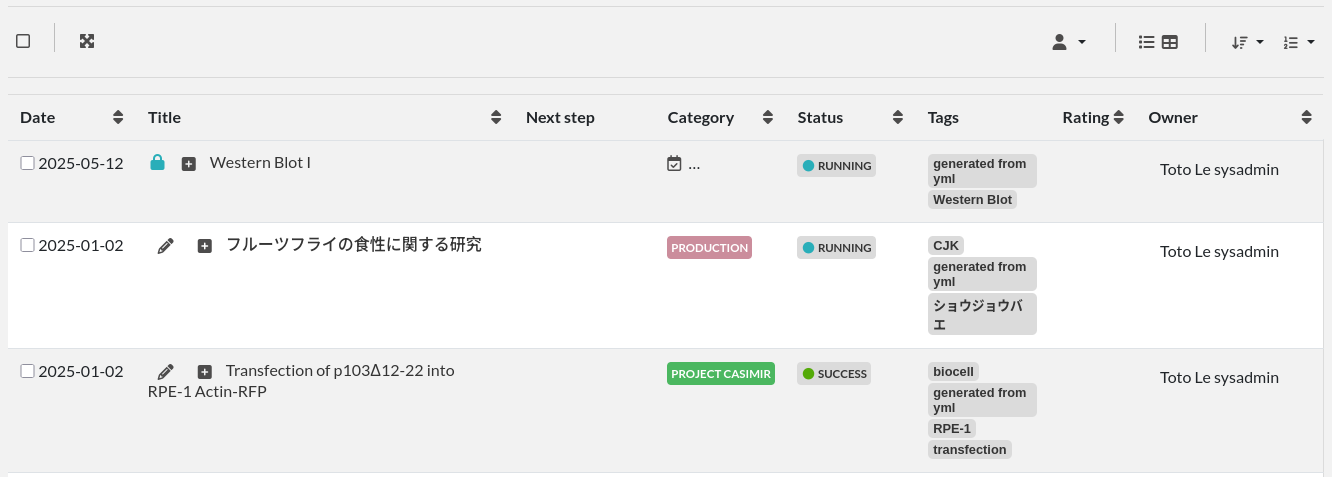
To make the entries appear like this:
Creating your first experiment
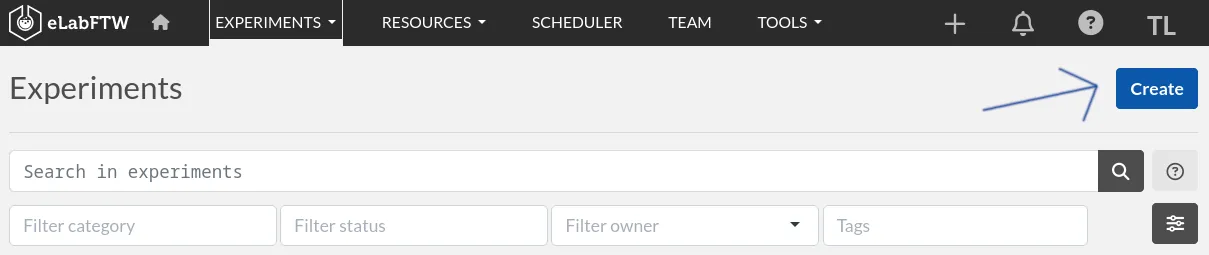
You can create an Experiment by clicking the Create button on the top right of the screen:
A modal window appears, allowing you to enter a title and optionally select an existing Template.
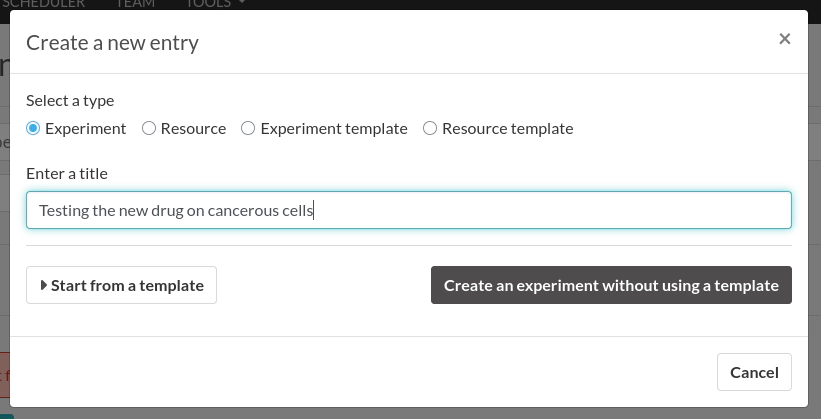
This modal window will select the type of entry (Experiment/Resource and their Templates) depending on which page it was clicked from. You can still change it manually afterwards.
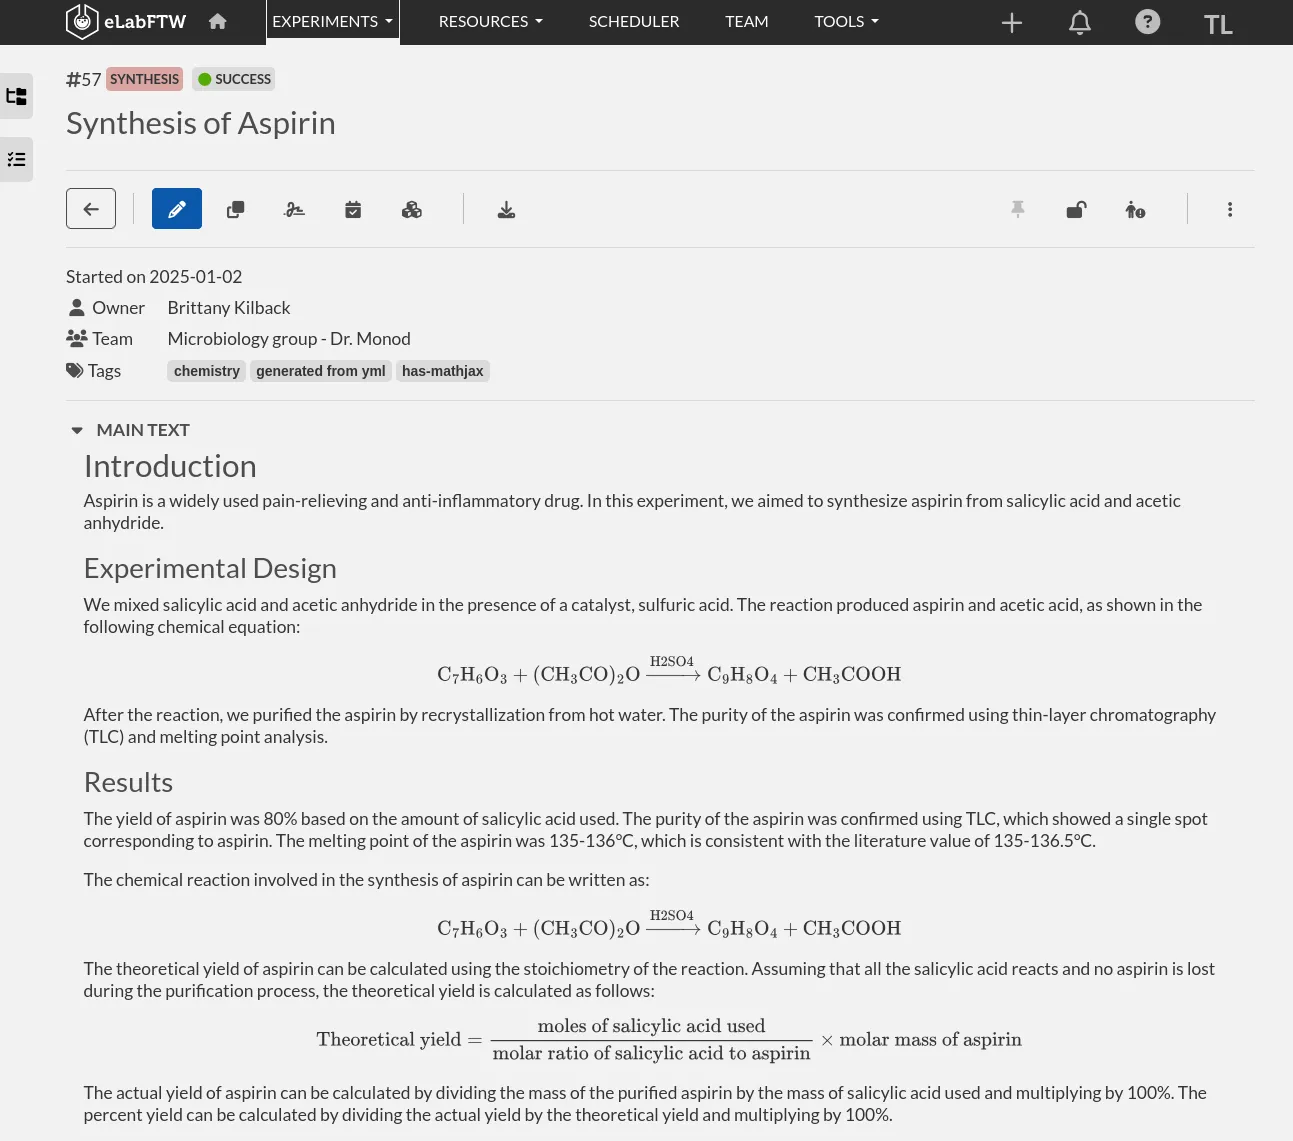
This is the view mode of an experiment with filled-in information.
Editing your first experiment
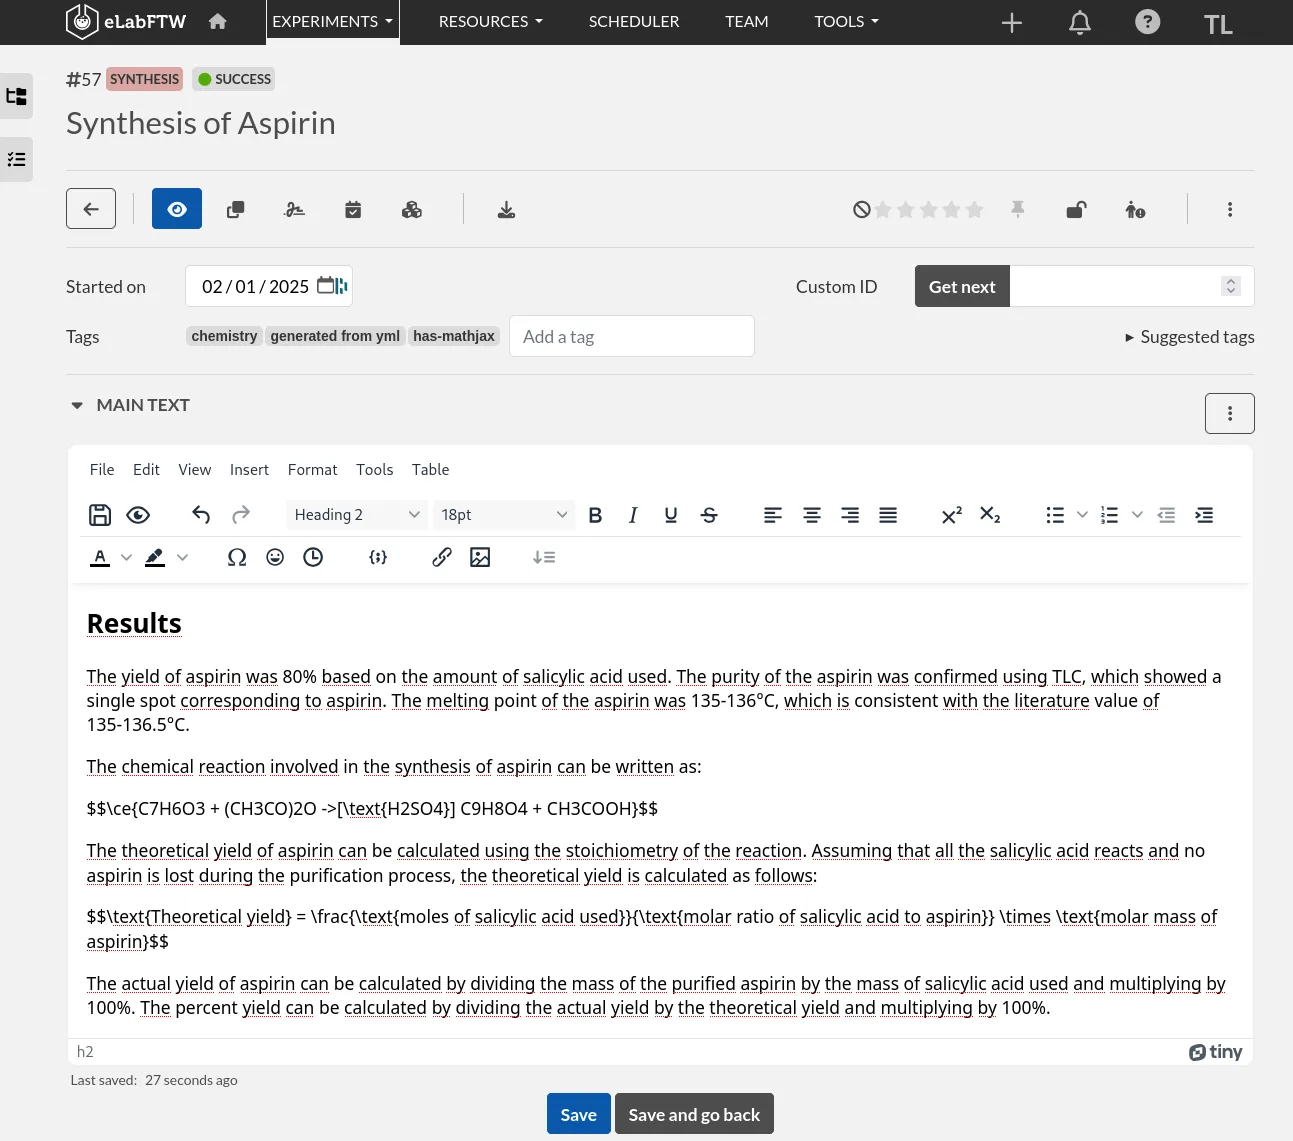
You will then be presented with a new Experiment entry. Experiment entries have two different modes: 'edit' and 'view'. By default, when an Experiment is created it will appear in 'edit' mode (you can see 'mode=edit' in the URL).
An Experiment entry can include many different types of information, such as:
- A title
- ID and custom ID numbers
- A Category
- A Status
- Tags
- Permissions
- The main text, which can include images, tables, and links
- Custom fields
- Steps
- Links to other Experiments or Resources
- Attachments (uploaded files)
The only required information is the title.
All fields are automatically saved upon change. Only the main text needs to be manually saved by clicking the Save button below the Main Text editor. An autosave is triggered 7 seconds after you stop typing.
Toolbar
For both Experiment and Resource entries, the top part of the page displays a toolbar with several available actions, as described below.

-
Go back: Get back to the index page.
-
Mode: Switch between "edit" mode and "view" mode.
-
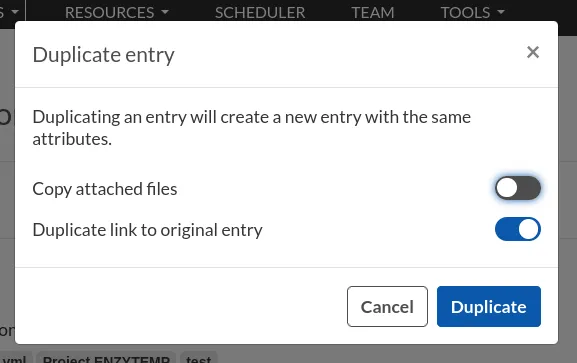
Duplicate entry: Create a new entry with the same Title, Tags, text, and links, but with today's date and the Status set as "Running". A pop-up message will ask if you would like to copy the attached files to the duplicated entry. An «I» character is added to the title to indicate that it is a duplicate.
-
Signature: Add a signature to prove that this entry has been approved by a referenced human. See Signatures documentation.
-
RFC3161 Timestamping: See RFC 3161 Timestamping section
-
Blockchain timestamping: See Blockchain Timestamping section
-
Export: Export your entry into different file formats, or to external repositories.
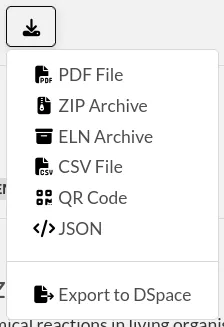
The ELN format is a new file format based on RO-Crate specification. It contains a special file (in JSON-LD) describing the contents of the dataset (one or several Experiments). It is designed and promoted by The ELN Consortium, an association of several ELN vendors that agreed on an interchange format for export/import of datasets. Learn more about it here: TheELNConsortium on GitHub.
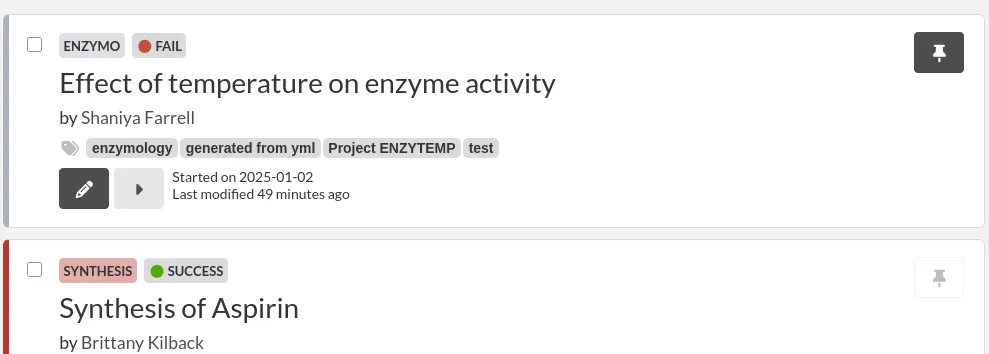
- Pin entry: Clicking this icon will make this entry appear on top of the list on the main page (pin entry). Use this to easily access frequently used entries.
- Lock/unlock entry: Use this to lock the entry and prevent further editing. Only the user who locked an experiment or an Admin can unlock it.

- Request action: Request another user to perform an action on a given entry.
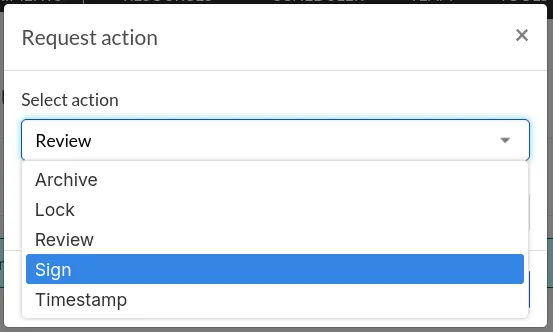
- Archive
- Lock
- Review
- Sign
- Timestamp
- Unarchive
- Ellipsis menu
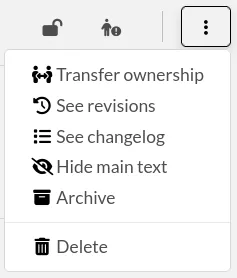
- Transfer ownership: For entries you created, you can transfer ownership to a different user
- See revisions: View revisions to the main text of the entry
- See changelog: View the changelog for the entry
- Hide main text: You can hide the main text section of the entry
- Archive/Unarchive: Archiving removes the entry from the default list and adds it to the list of archived entries
- Delete entry: Perform a soft-delete of the entry
Date (started on)
The date is set to today's date by default. You can edit it as you wish. The effective creation timestamp is stored in the backend database in another (read-only) attribute.
Custom ID
This attribute (null by default) can be set as a number after a Category is selected. Custom ID numbers will then be automatically assigned in an incremental fashion when new Experiments with that Category are created. One can also click the Get next button to fetch the next available Custom ID for entries of that Category. The Custom ID is displayed before the title.
Title
This is the title of the Experiment. A duplicated Experiment will have a «I» character appended to the title upon creation.
Category
You can assign a "Category" to each Experiment. Only an Admin can define the categories that are available for your team to use. Categories can correspond to projects, types of Experiments, and other strategies for grouping Experiment entries. You can easily browse groups of Experiments by Category from the main Experiment page.
Status
This feature lets you set the 'Status' of an Experiment. The default status options are:
- Running
- Needs to be redone
- Success
- Fail
These Status options can be modified by an admin via the admin panel.
Tags
Tags allow users to easily group and sort Experiment entries. You can think of them as folders, but they are more powerful because each Experiment can have many different Tags. The Tag system thus enables efficient cross-searching.
You can list all Experiments with a given Tag by clicking on the Tag or searching for it in the Tag search bar. To add a Tag to an Experiment entry, type the name of the tag in the Tag input field and press Enter or click anywhere outside the input field. You can add an unlimited number of Tags. Click on an existing Tag to launch a prompt that will allow you to remove it (in edit mode). Tags are common to each team. Autocompletion favors the reuse of existing Tags.

Permissions
The "Visibility" and "Can write" menus allow you to control who can access and change a given entry.
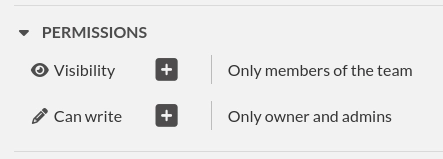
Click the Plus icon to view, add, or remove permissions. A modal window will open:
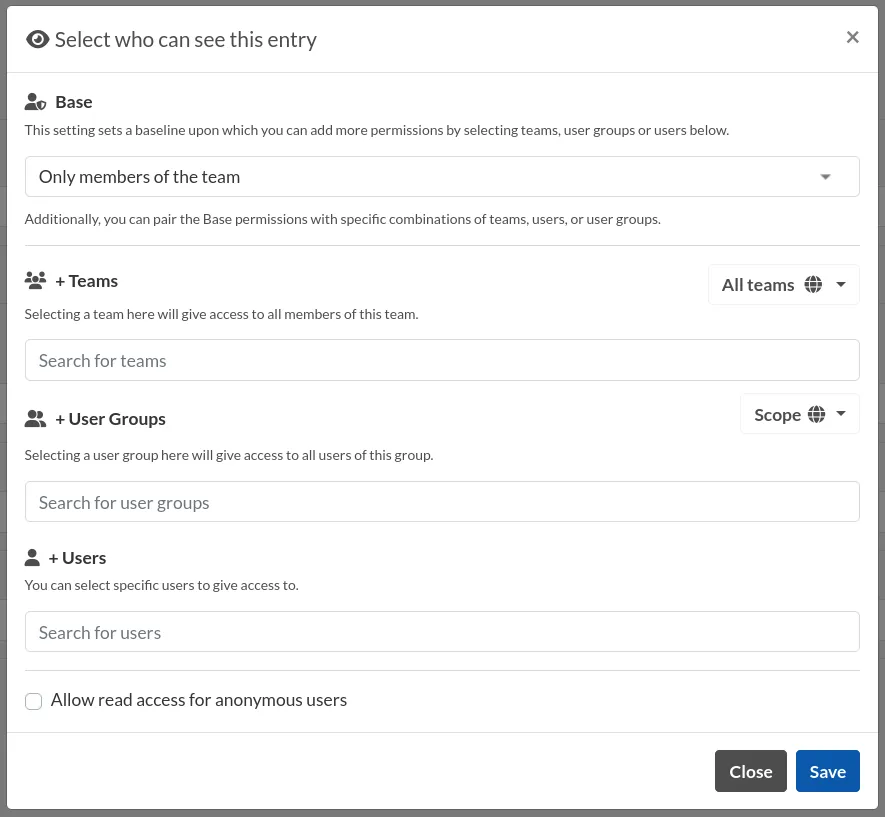
Select a base permission to extend or restrict the current settings, and optionally, add permissions to entire teams, teamgroups, or individual users.
The permissions are additive on the base permission. Make sure to set a restrictive base permission if you do not wish to share an entry, and then add teams, teamgroups or users accordingly.
Main text
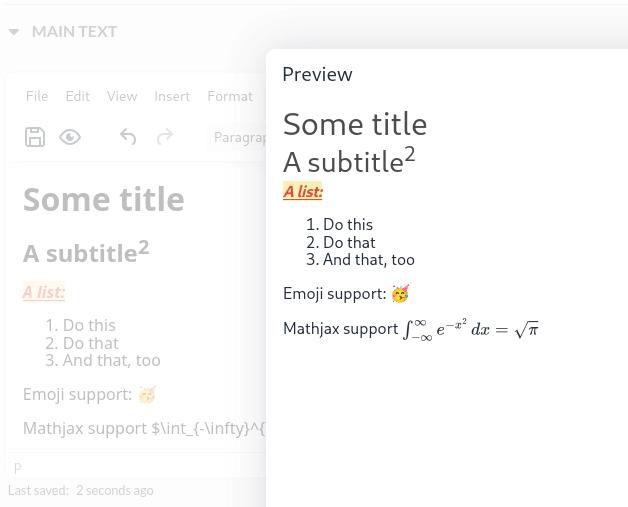
This is the space to freely describe your experimental setting, procedure, results, and any other information you wish to include about your research. In this rich text editor, you can add text with various formatting options, create tables, and add images, links, etc…
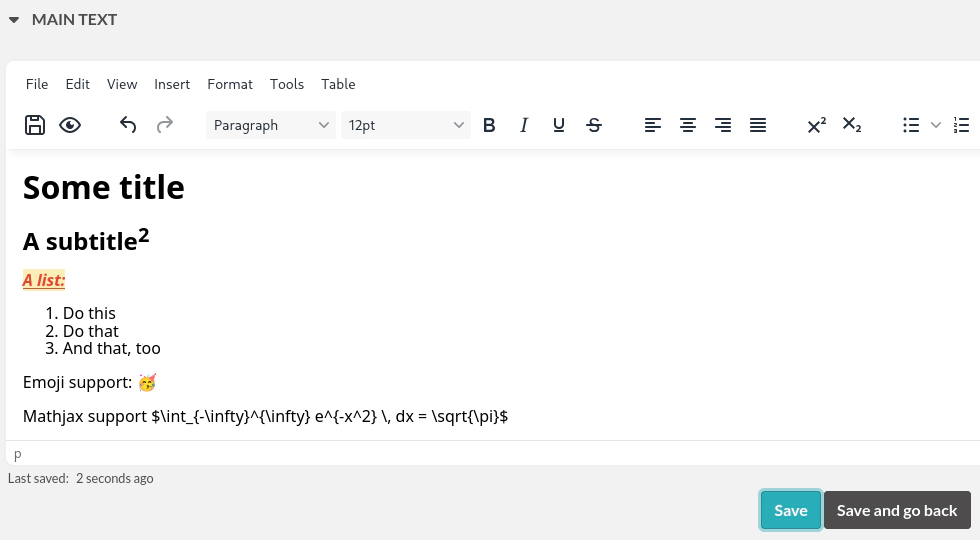
After clicking the "eye" icon for preview:
Inserting an image
To insert an image into the main text, simply drag and drop it into the text editor. There is also an icon in the toolbar to open the file browser and select your file.

You can also insert an uploaded image by clicking on the ellipsis menu on the file icon in the "Attached Files" section (three vertical dots on top right) and selecting Insert in the text at cursor position.

Inserting templates
From the Insert menu in the text editor, you can select "Insert template" to import the contents of the text editor from an existing Experiment template. This allows you to combine content from multiple templates.
Using Markdown

You can also use Markdown to create the main text. You can switch to Markdown by clicking the "Switch editor" button at the bottom right of the main text box. If you'd like Markdown to be the default option, go to Settings and select "Disable the rich text editor and write Markdown directly".
Tables
If you add tables to the text editor you might want to dynamically sort the contained data. Don't worry, eLabFTW has you covered. Sort icons are displayed in "view" mode when "header cells" (<th>) are defined and a table is set as sortable. The table should have column names in the top row. You can select the top row by clicking the left mouse button with the cursor over the leftmost cell, and while keeping the mouse button pressed, move the cursor to the rightmost cell. Release the mouse button. The top row should be highlighted now. Next, from the text editor menu select «Table» → «Cell» → «Cell properties». In the dialog change the «Cell type» from «Cell» (<td>) to «Header cell» (<th>). Finally, you can activate sorting by clicking the «sortable table» icon (|sortable-table-icon|) in the tool bar. The icon will also indicate whether a selected table is sortable. After you have saved the changes (see "Saving your changes), you can go to "view" mode and dynamically sort the table. The changed order is not stored in eLabFTW. Merged cells in the top/header row (colspan) and in columns (rowspan) are not supported.
Using LaTeX
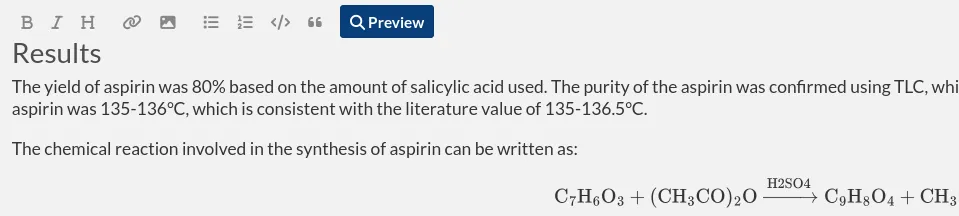
It is possible to express mathematical/chemical notation in eLabFTW, and formulas are rendered in both "view" mode and pdf exports.
To do this, eLabFTW uses Mathjax with the ams extension.
Try the Mathjax expression below (make sure it is not pasted between <pre> Tags!):
$$\sum_{i=0}^n i^2 = \frac{(n^2+n)(2n+1)}{6}$$
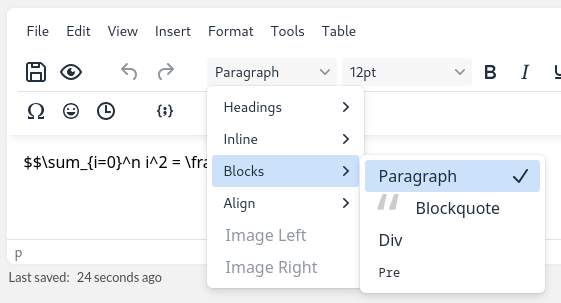
<pre> tag into a paragraph.Use one $ for inline mode and $$ for block mode.
Miscellaneous
You can use basic text editor shortcuts and code snippets in the text editor to add highlighting, special characters, horizontal lines, etc...
For a list of text shortcuts see this link: https://www.tiny.cloud/docs/tinymce/latest/keyboard-shortcuts/
Examples:
ctrl+shift+d: add date/time at cursorctrl+=: subscriptctrl+shift+=: superscript
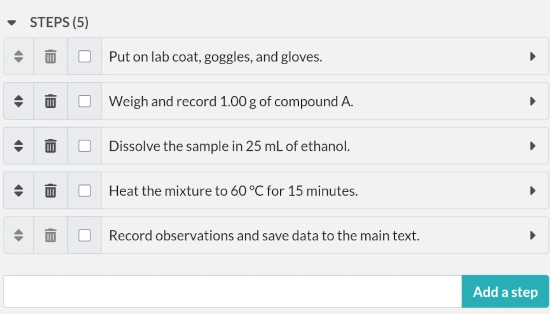
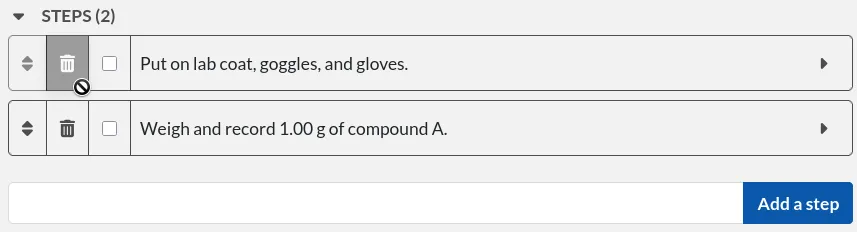
Steps
You can use steps to list actions that need to be taken in connection with a given Experiment or Resource. When a task has been completed, you can click on the corresponding checkbox to indicate that that step is done. The "Next step" for each Experiment or Resource will be shown on the main Experiments or Resources page (index list) under the title for that entry. This lets you easily view the next step for each entry. You can also view the next steps for your Experiments and Resources by clicking on the "To-Do List" icon at the top left side of the main page.
You can also add steps when creating a template, and choose to lock them.
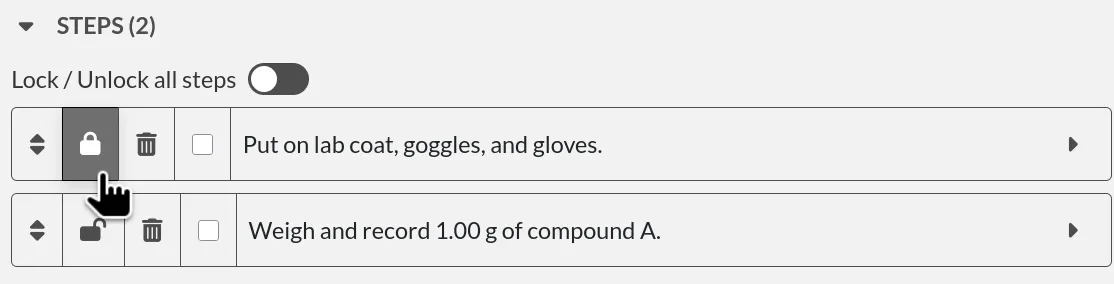
When a new Experiment or Resource is created from that template, the locked steps will appear as read-only and cannot be modified or deleted.
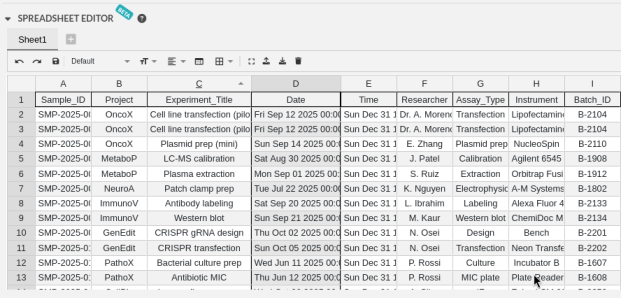
Spreadsheet Editor
With version 5.3 comes a new spreadsheet editor, present in the edit page of an entry. It lets users display and manipulate tabular data directly inside eLabFTW, with support for common spreadsheet operations and formula calculations (e.g. CSV / XLSX import-export, cell arithmetic, SUM, ROW, etc.).
General formula support
The spreadsheet editor supports common spreadsheet formulas and operators, allowing users to perform calculations directly in cells. Formulas are parsed when expressions start with the = character.
When cells referenced by a formula change, all dependent formulas are recalculated automatically (reactive updates). Copy, paste, and drag-fill behavior also adjusts formula references appropriately (relative vs. absolute).
Arithmetic operations
You can use the SUM function for addition, and simple inline operators for subtraction, multiplication, and division directly in cells.
For example::
    =SUM(A1:A5)
    =D1 - D2
    =A5 * E7
    =SUM(B1, C1 * D1)
These formulas follow standard spreadsheet behavior, supporting mixed operations and cell references.
Special / built-in helper functions
In addition to standard functions such as SUM or AVERAGE, several helper formulas are available::
    =CELL()         Returns the cell reference (for example `A1`).
    =COLUMN()       Returns the current column number.
    =ROW()          Returns the current row number.
    =VALUE(c, r)    Returns the value of the cell at the given column and row.
    col: Number, row: Number, processedValue: Boolean.
This feature is currently in BETA and should be used with caution, when manipulating important data.
See more from the jspreadsheet-ce documentation.
Linked Resources/Experiments
You can link a Resource or Experiment entry to another Experiment or Resource entry. The number of links is unlimited.
In the Main text, type # and begin typing the title of the entry you want to link. After three characters, an autocompletion list will appear. Select the desired entry and press Enter. This entry will automatically be added to the Linked Experiments/Resources section and inserted in the text editor as a hyperlink to the linked entry.
In the Linked Experiments/Resources section, type the title of the entry you wish to link in the appropriate section. Like in the text editor, an autocompletion list will appear. Select the desired entry and press Enter. This entry will automatically be added to the Linked Experiments/Resources section.
The linked Experiments/Resources section can be used to view the Resources or Experiments that are linked to a given entry. For example, you can view all the Experiments that use a particular Resource by looking at the Linked Experiments section in the entry for that Resource.
You can also use this feature to organize entries by project, sort of like a folder. For example, you can create a Resource entry for a given project and link all the Experiments and Resources that are associated with that project.
In Edit mode, besides previewing linked-entry content (1) and deleting a link (4), you can use two actions to import content from a linked entry:
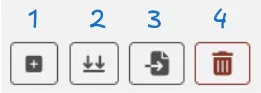
Import Links (2): Copy links from a linked entry into the current entry.
For example, let's say there is an experiment "Time travel" that requires certain reagents (banana peel and beer) and devices (flux capacitor and Mr. Fusion) which are explained in more detail in the corresponding resource entries. The resources are linked to the experiment. Unfortunately, the experiment does not work the first time, so there is need for a second iteration "Time travel II". Time travel II gets a link to Time travel and now all the required reagents and devices can be imported easily by clicking the "Import Links" button.
Import Body (3): The text body of a linked entry is copied into the current entry at the cursor position.
Attach a file

Click this region to open the file browser, or drag and drop a file to this region to add it to the entry. The file size limit depends on the server configuration, but there is no limit on file type. If you upload an image, a thumbnail will be created. There is no limit on the number of files you can attach to an Experiment.
Various file types are recognized by eLabFTW:
- molecule files such as
cif,pdb,sdf, andmolfiles: The resulting icon will display the molecule in 2D or 3D - DNA files such as
FASTA,gb,ape,dna, andgff: These will be displayed via a fully featured viewer - image files such as
png,jpg,gif, andtiff: These will show as a thumbnail icon pdffiles: These are shown as thumbnail icons and can optionally be included in pdf exports
Saving your changes
To save changes made to the text editor, click the floppy disk icon on the top left of the editor, or the Save button below it. Changes in the text editor are saved automatically 7 seconds after the user stopped typing.
Changes made to any other field are saved automatically, or saved when you click outside of the field. A successful save action is indicated by the "Saved" banner that will show at the top left of the screen.
elabid
In the bottom right part of the Experiment, you can see something like: «Unique elabid: 20150526-e72646c3ecf59b4f72147a52707629150bca0f91». This number is unique to each Experiment, and immutable (won't ever change). You can use it to reference an Experiment with an external database.

Comments
People can leave comments on Experiments or Resources. Not everyone can edit your Experiment, but they can leave a comment if they have read access. The owner of the entry along with any other user part of the discussion will receive a notification if someone leaves a comment.
Archival
Archiving an experiment
Experiments can be archived to keep your workspace organized. To archive an experiment, open the entry, click the More options button in the top-right corner of the toolbar, then click Archive:
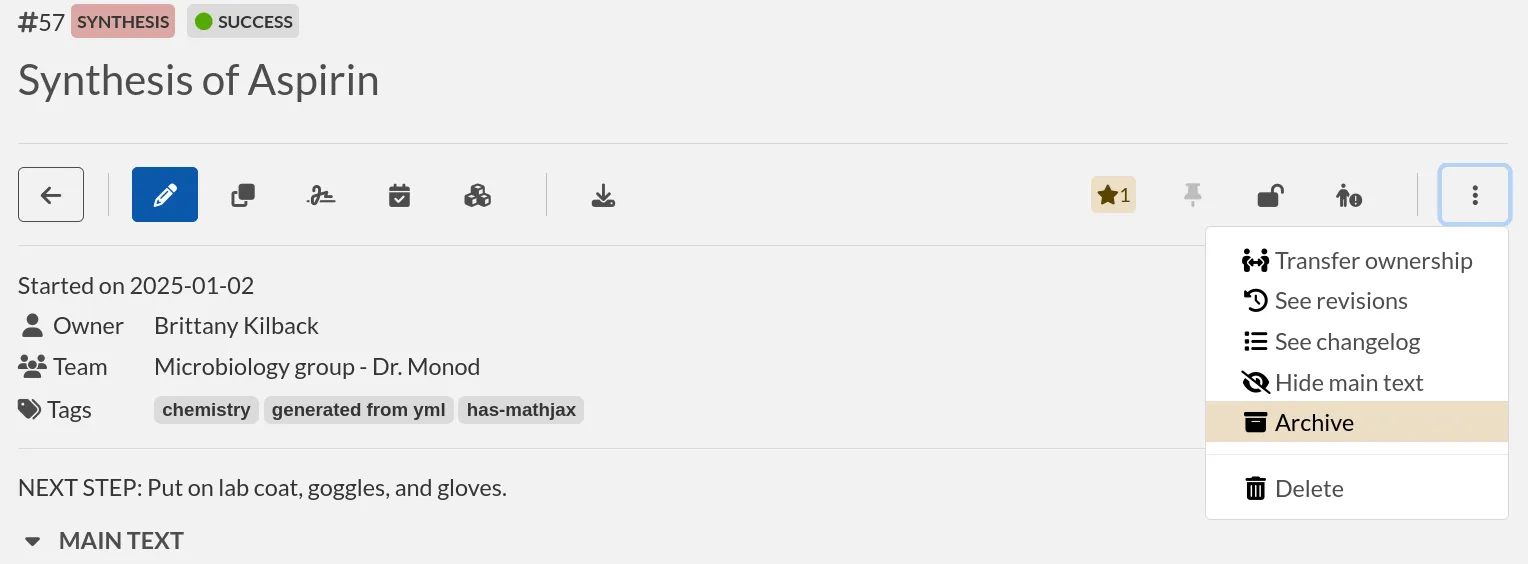
Once archived, an experiment will no longer appear in the default search results or be included in exported data.
Viewing Archived Experiments
To display archived experiments:
-
Navigate to the Experiments list.
-
Click on the Show more filters button:

- Use the Select state filter and choose Archived.
Archived experiments will now appear in the list, indicated by a small archive icon.
Working with Archived Experiments
While archived experiments remain viewable, they are read-only. To edit it again, you must first unarchive the experiment.
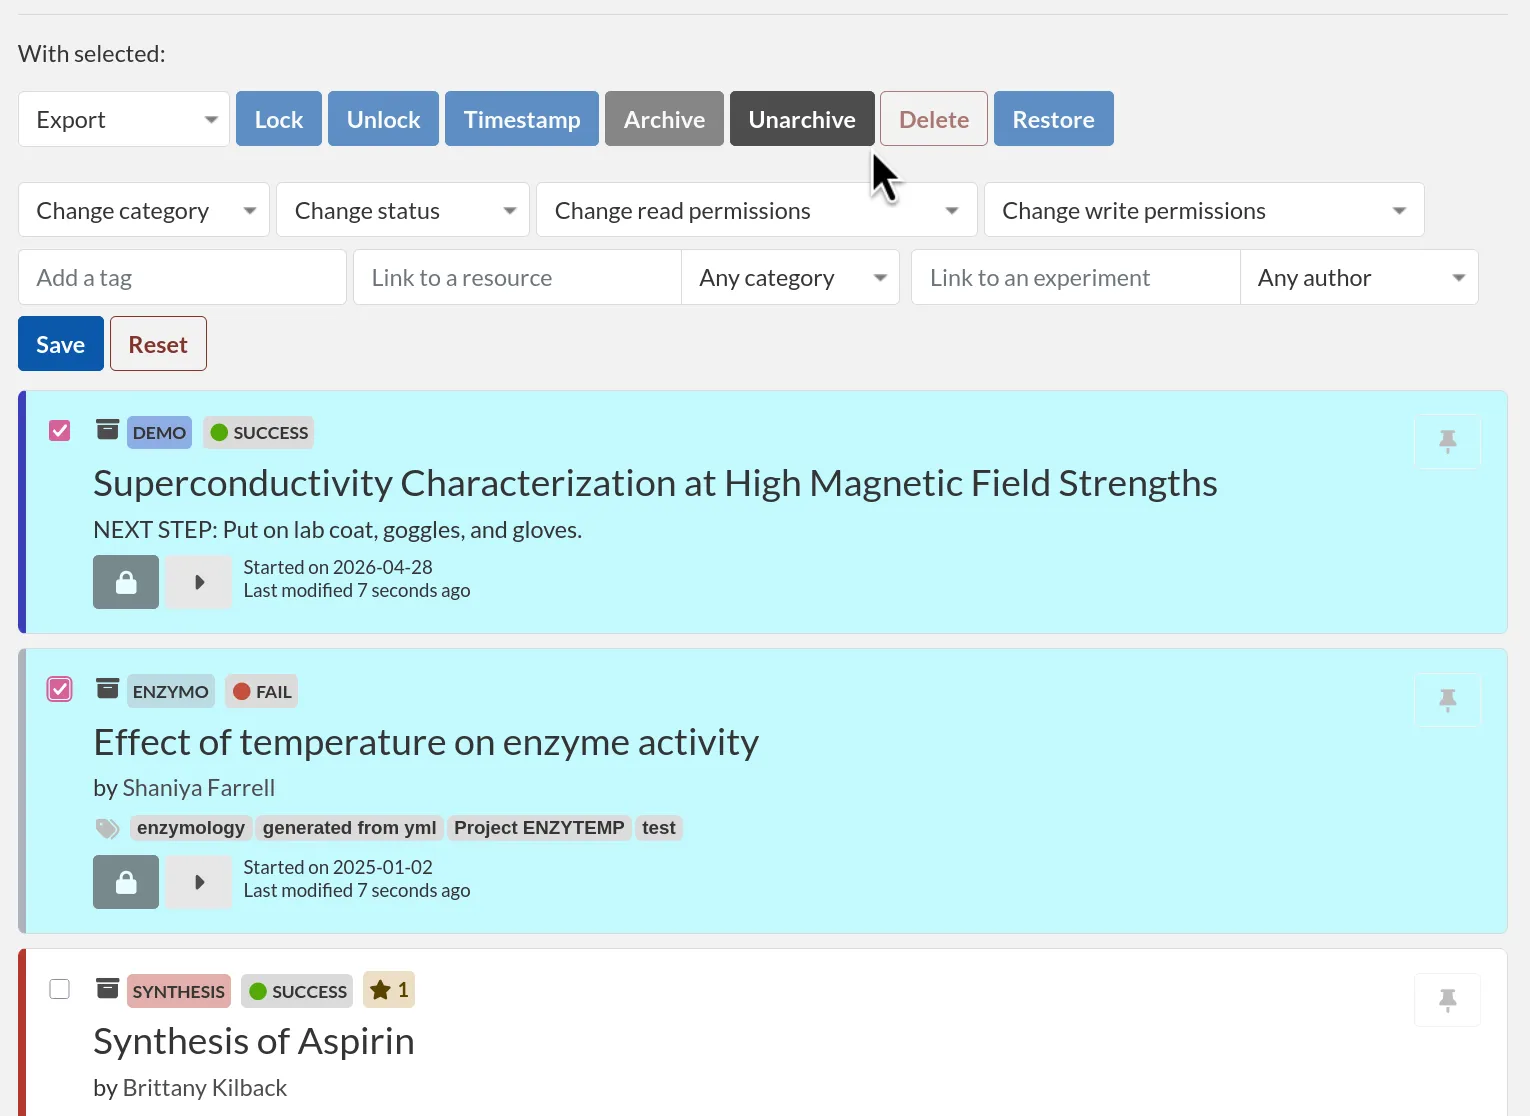
You can multiselect experiments to unarchive them in bulk:
Alternatively, you can open an individual archived experiment to review its content. If you decide to restore it, click on the "More options" button located at the top-right corner of the toolbar.
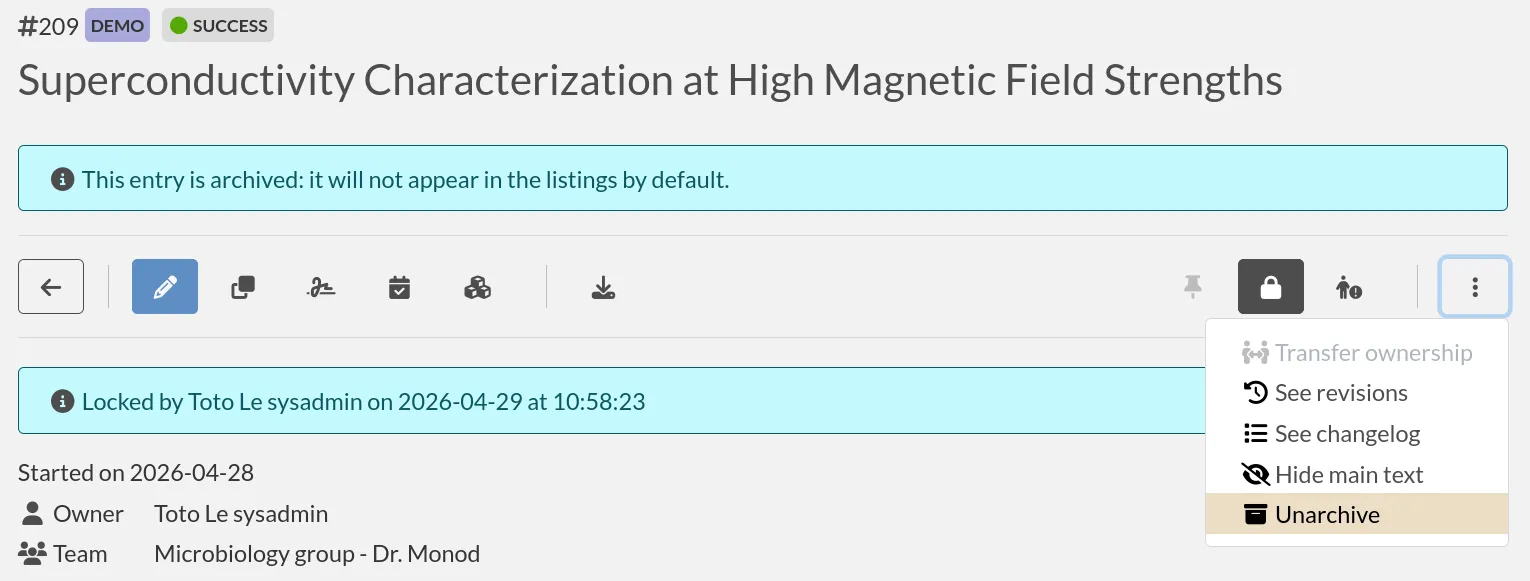
Once unarchived, the experiment will return to the active list and be fully editable again.
Deleting an experiment
Experiments can be deleted when they are no longer relevant. Once deleted, an experiment is removed from the active list and placed in the trash. Deleted experiments are not included in searches or exports. The soft-delete mechanism prevents actual removal of data.
Viewing Deleted Experiments
To list deleted experiments, select Deleted state, similarly to what is described above for Archived entries.
Deleted experiments will now appear in the list, indicated by a trash bin icon.
Working with Deleted Experiments
Deleted experiments can still be accessed and restored, but they remain read-only until restored.
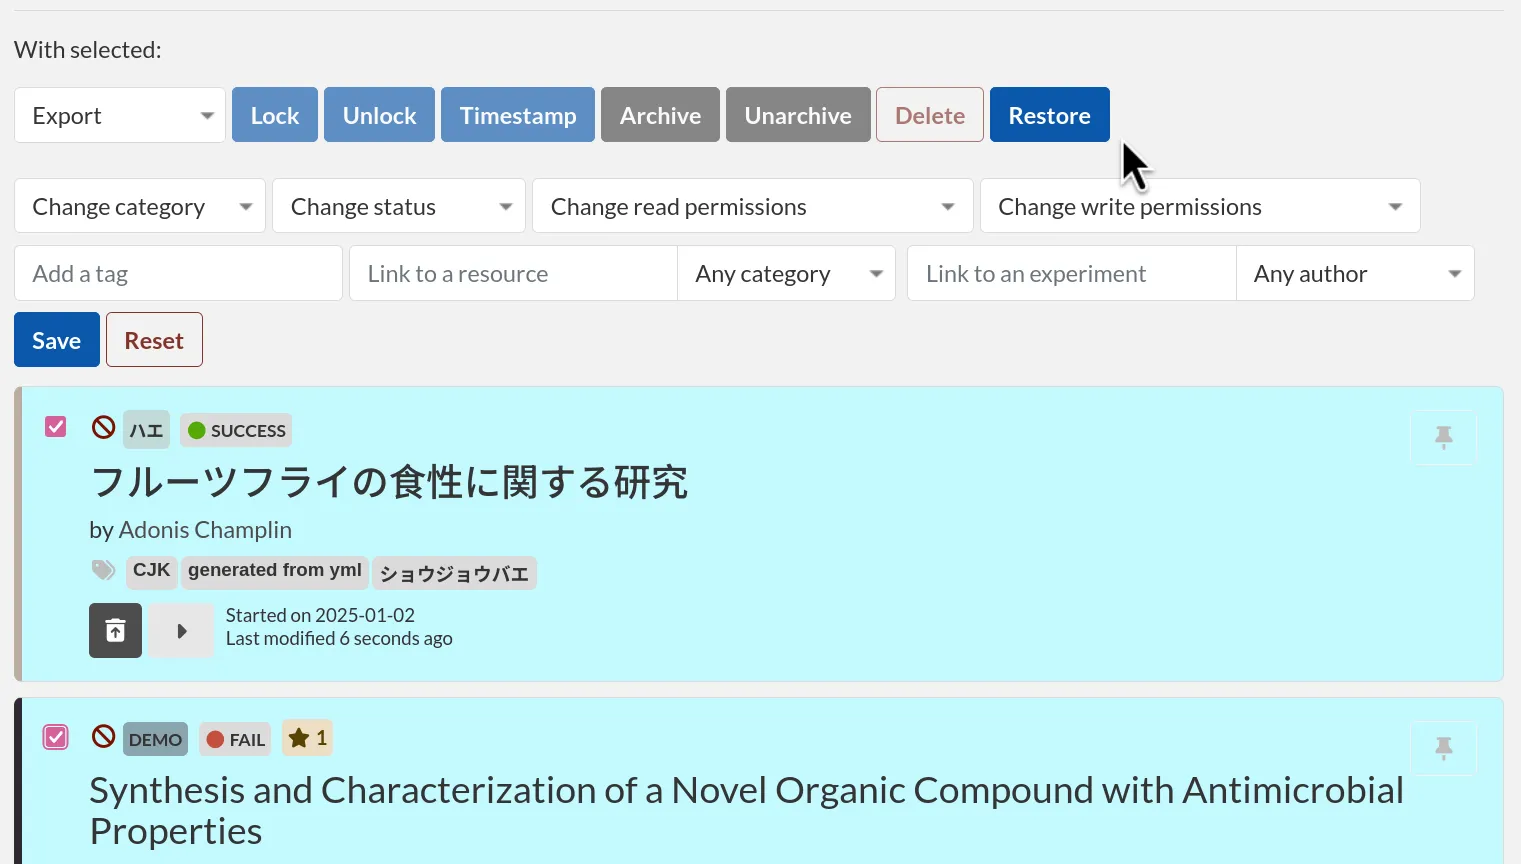
You can multiselect deleted experiments to restore them in bulk:
Alternatively, open an individual deleted experiment to review its content. To restore it, click on the "Restore entry" button.
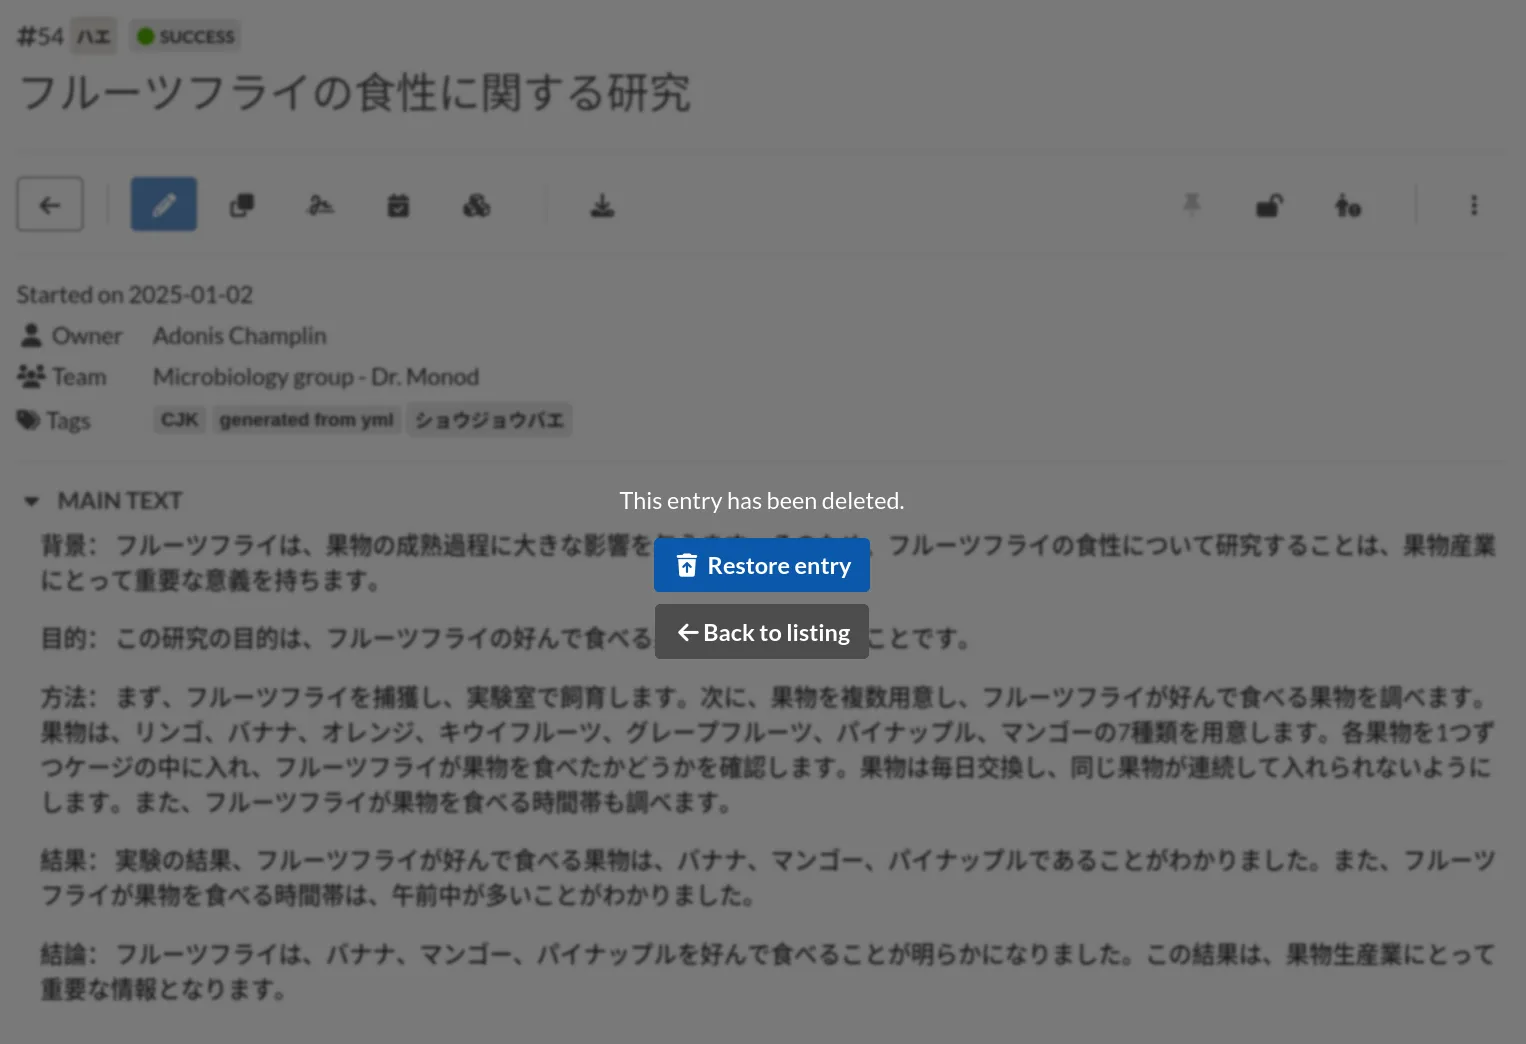
Once restored, the experiment will return to the active list and become editable and exportable again.