Importing antibodies from a spreadsheet file
Our project is to import antibodies stored in a spreadsheet file. We will use a python program to achieve this.
This tutorial will show you how to use the HTTP REST API provided by eLabFTW.
We use the terminology "spreadsheet file" because Microsoft's Excel is not the only software out there capable of processing spreadsheets, and .xlsx file format is not the only file format that exists.
High level description
In this tutorial, we will create a python program that will:
- read a .csv file
- create a Resource for each row
- adjust extra fields
This tutorial assumes a Mac, GNU/Linux or BSD environment with standard tools installed (python3, mkdir, etc...). On Windows, we recommend installing Ubuntu from the Windows Store and using that GNU/Linux environment.
Preparing the file
The spreadsheet file needs to be prepared beforehand.
If you have a .xlsx file, you'll want to save it as an UTF-8 CSV file.
Open it in your favorite spreadsheet editor (e.g. Libreoffice Calc, Microsoft's Excel) and click File > Save as..., select CSV, make sure to select UTF-8 if available.
On LibreOffice, check "Edit filter settings" so you have a chance to select UTF-8 encoding if your file was in ISO-8859-1 for instance. If you do not save the file as UTF-8, accentuated characters and some special characters like μ or β won't be processed correctly and produce errors.
We use a CSV file extension in this tutorial to standardize the input, which could be coming from .ods, .xls or .xlsx file. It also simplifies processing as CSV is well supported in base Python.
Creating the program
A python program is simply a text file with a .py extension (a script). If this is your first program ever, you can use a text editor such as Notepad++ on Windows, or ZED on any platform.
We will use the tool uv to create our development environment.
Download and install uv by following instructions from uv's website.
If you are already familiar with different python tooling, such as conda, pipenv, poetry, pip or virtualenv, feel free to use that instead of uv. But let's be honest: you won't regret trying out uv! ;)
Create the environment with:
mkdir import-antibodies
cd import-antibodies
# this will create a few basic files
uv init
ls
Edit the main.py file:
#!/usr/bin/env python3
print('Import antibodies script')
Execute it:
uv run main.py
You should see "Import antibodies script" printed to the screen. Now that we have the basics covered, let's do something meaningful!
Reading the CSV file
We will need the standard csv and json modules in our program:
# we will use the generic csv module
import csv
# we also need the json module for the metadata (extra fields) part
import json
Let's assume the file we want to import is named antibodies.csv, and is present in the same folder as the import.py script we just created. We will hardcode the input filepath.
Feel free to add command arguments to ask for a file path as input instead of hardcoding the file path in the program.
CSV_PATH ="antibodies.csv"
Here we defined a constant with the file name.
Let's add some code to read the file:
with open(CSV_PATH, newline='') as csvfile:
    # we read the CSV using the standard "csv" library from python. No need for anything fancier.
    reader = csv.DictReader(csvfile, delimiter=',', quotechar='"')
    rows = list(reader)
    row_count = len(rows)
    column_count = len(rows[0]) if rows else 0

    print(f"Rows: {row_count}")
    print(f"Columns: {column_count}")
Try it out: uv run main.py. It should display the number of rows and columns in your csv file.
Preparing eLabFTW
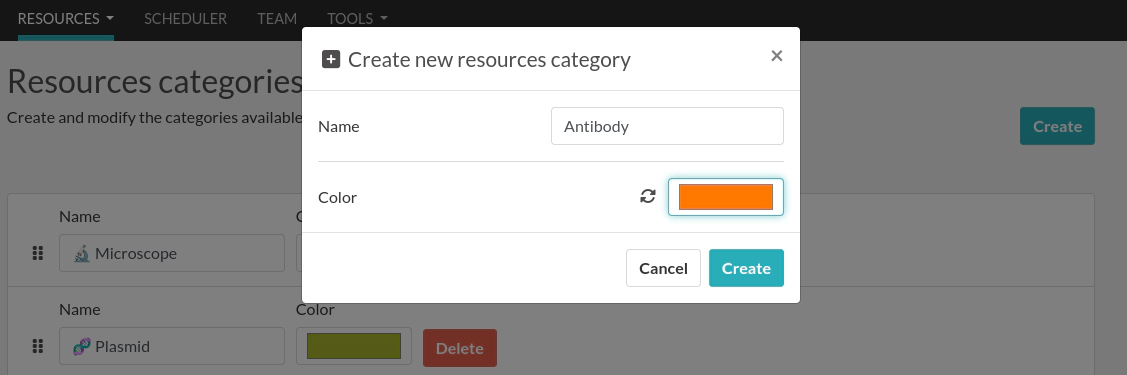
We will create a Resource Category "Antibody" and a Resource Template "Primary Antibody". From the web interface, go to the Resources Categories page from the Resources menu and click the Create button to create a new category:
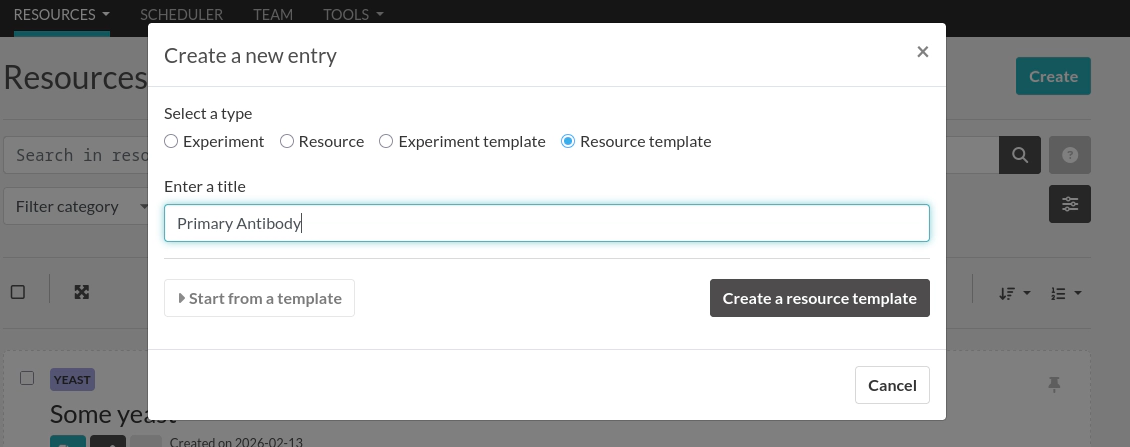
Next, go to the Resource templates page and create a new template:
Set the Category to "Antibody":
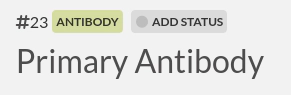
Take note of the #ID, in the screenshot above it's 23.
Add the Resource template ID
Let's go back to our script and configure the script to use that Resource Template for all imported rows:
RESOURCE_TEMPLATE_ID = 23
Install elabapi-python
To interact with our eLabFTW instance, we will use the official python library: elabapi-python.
Add it to the dependencies with:
uv add elabapi-python
Import it in the script with:
import elabapi_python
Configure the library
import os

# START CONFIG
# Basic configuration: Api Key and Host URL: use environment variables
API_KEY = os.getenv('API_KEY')
if API_KEY is None:
    raise EnvironmentError("API_KEY is not set!")
# Get the server address from the environment or use the default development value
API_HOST = os.getenv('API_HOST')
if API_HOST is None:
    raise EnvironmentError("API_HOST is not set!")

# Initialize a configuration object from the library
configuration = elabapi_python.Configuration()
# Set the host
configuration.host = API_HOST
# Create an API client object with our configuration
api_client = elabapi_python.ApiClient(configuration)

# Set the Api Key in Authorization header
api_client.set_default_header(header_name='Authorization', header_value=API_KEY)
# END CONFIG
A more complete example is available in the examples folder: client.py
Process data
At this point, you can figure things out by yourself by reading the complete (very similar) script here:
https://github.com/elabftw/elabapi-python/blob/master/examples/09-import-csv.py
Good luck!