Templates
A Template is a reusable starting point for an Experiment or a Resource. It saves time and helps your team record the same information consistently, instead of starting with an empty page each time.
| Template type | Typical uses |
|---|---|
| Experiment Template | Repeated procedures, such as PCR, microscopy or sample preparation. |
| Resource Template | Materials, equipment or shared documentation, such as antibodies, plasmids, instruments or protocols. |
A Template defines the contents and defaults of new entries. A Resource Category groups related Resources: for example, the "Antibodies" category can contain entries created from both "Primary antibody" and "Secondary antibody" Templates.
Creating a Template
- Open Experiment templates from the Experiments menu, or Resource templates from the Resources menu.
- Click Create, select the appropriate Template type, enter a descriptive title and create the Template.
- Edit it as you would an ordinary entry: add text, Custom Fields, Steps, Tags, Links and any reusable attachments.
- Save your changes and configure the permissions described below.
You can also select Create template from entry in an Experiment or Resource's toolbar menu. Before sharing the resulting Template, remove results, dates and identifiers that belong only to the original entry.
Designing a useful Template
Start with the information your team needs to record, and keep the Template straightforward to complete:
- Main text: provide instructions and headings, such as Objective, Materials, Method, Results and Deviations from the protocol. Leave space for the observations specific to each Experiment.
- Custom Fields: use structured inputs for information you want to search or compare, such as supplier, lot number, sample identifier or temperature. Dropdown menus encourage consistent wording; number fields can include units. Group related fields and add descriptions explaining what to enter. See Custom Fields.
- Steps: add a checklist for recurring tasks, such as preparing controls or checking instrument settings.
- Links and attachments: include shared protocols, reference documents or Resources that apply to every entry created from the Template. Add the particular sample, reagent stock or data files to the resulting entry when they are known.
For example, an antibody Resource Template could contain fields for supplier, catalogue number and lot number. Create separate Resources for the materials or stocks you need to distinguish, then link the actual Resources used in an Experiment. This makes it easier to identify Experiments that used a particular lot.
Keep Custom Field names consistent across your team's Templates. Saved searches and CSV imports use these names, so renaming a field can prevent them from matching newer entries. Adapt field descriptions to explain your team's conventions.
For fields that must be filled in anew, such as a sample identifier or measurement date, set blank_value_on_duplicate to true in the JSON editor. Their values will be cleared when creating an entry from the Template or duplicating an entry. Clearing a value leaves it empty; it does not restore a Template default.
Creating an entry from a Template
On the Experiments or Resources page, click Create, select the entry type and expand Start from a template. Find the Template and click its Create from template button. Alternatively, open a Template and click Create entry from template in its toolbar (the document icon with a plus sign).
The new entry copies the Template's text, Custom Fields and their defaults, Steps, Tags, Links, attachments, Category and Status. Update its title, fill in the fields and record the information specific to this entry. Check copied Links and replace any placeholder identifiers or URLs supplied by the Template author.
Editing a Template affects entries created afterwards. It does not update entries already created from it.
You can also reuse parts of a Template while editing an existing entry: Load fields in the Custom Fields section loads fields from a Template, and Insert → Insert template in the rich text editor inserts an Experiment Template's main text.
Sharing and permissions
Templates have two separate sets of permissions:
- Permissions for the template control who can read and use the Template, and who can edit it.
- Permissions for the derived entry define the initial read and write permissions of Experiments or Resources created from it.
For example, you can make a Template readable by your team and editable only by its maintainers, while allowing team members to edit the Resources created from it. Configure both sets before sharing the Template. The Lock down read permissions and Lock down write permissions options allow only Admins to change the corresponding permissions on derived entries.
Use Scope to find your own Templates (Self), those belonging to your team (Team), or all Templates you have permission to read (Everything). The Scope selector is also available when choosing a Template in the creation dialog.
Pinning Templates
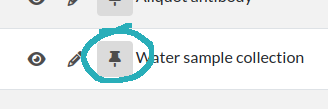
Use the thumbtack icon to pin frequently used Templates so they appear at the top of your Templates list. Pinning is personal: each user chooses their own pinned Templates. Click the icon again to unpin a Template.
Reusing community Templates
You can download shared Templates from eln.community or the SFB 1638 eLabFTW Template Repository. Import their .eln files through Import in the user menu; see Importing a .eln archive.
After importing, review the Categories, both sets of permissions and the field descriptions. Adapt embedded URLs and placeholder entry IDs to your instance, then create a test entry to check the result before sharing the Template with your team.
For detailed examples of linked materials, stocks, instruments and Experiment documentation, see eLabFTW Template Package for Life Sciences by Neele Drobnitzky (SFB 1638 / CRC 1638, University of Heidelberg). The CC BY 4.0 guide informed the practical design suggestions on this page; its package-specific conventions are optional.