Miscellaneous
How to group Experiments into Projects?
There are several options:
- Use Categories for Experiments: they are defined by an Admin and are common to the Team.
- Use Tags/favorite Tags: User or Admin defined, depending on the Team settings (by default Users can create new Tags).
- Use a Resource of Category "Project" and the link system to link Experiments to that Project.
- Directly link Experiments together using the link system.
First, try to go beyond the nested, tree-like structure of hierarchical folders.
Imagine you have an Experiment which is:
- about "Protein MR73"
- using "Western blot"
- an external collaboration
- with "HEK cells"
Now if that Experiment was a file, you might want to store it in "Collaborations > Western Blot > MR73" maybe. Or "Project MR73 > Collaborations > HEK"?
But what if you have another one that is also using HEK cells but has nothing in common with the previous one. How would you go about looking for all the Experiments with HEK? And all the Experiments related to MR73 that involve a Western Blot?
In a traditional folder structure, you would need to search for it in almost each sub-folders.
Enter Tags.
Tags
Tags are a way to label your Experiments (and database objects) with defined keywords and you can have as many as you want!

Now with the Experiments correctly tagged, finding them through different search angles becomes easy! You can search for one Tag or many Tags directly from the main page.
Favorite Tags
Over time, you will have some Tags that become your favorites, as they are always the ones you look for for a set of Experiments.
Since version 4.2.0 it is possible to define "Favorite Tags" that will appear in the left pane of the page listing entries. It allows quick overview of related entries. You should try this feature, start by clicking the arrow on the left of the screen to toggle the left pane. Click the + button and start typing a Tag to add it to the list of Favorite Tags.
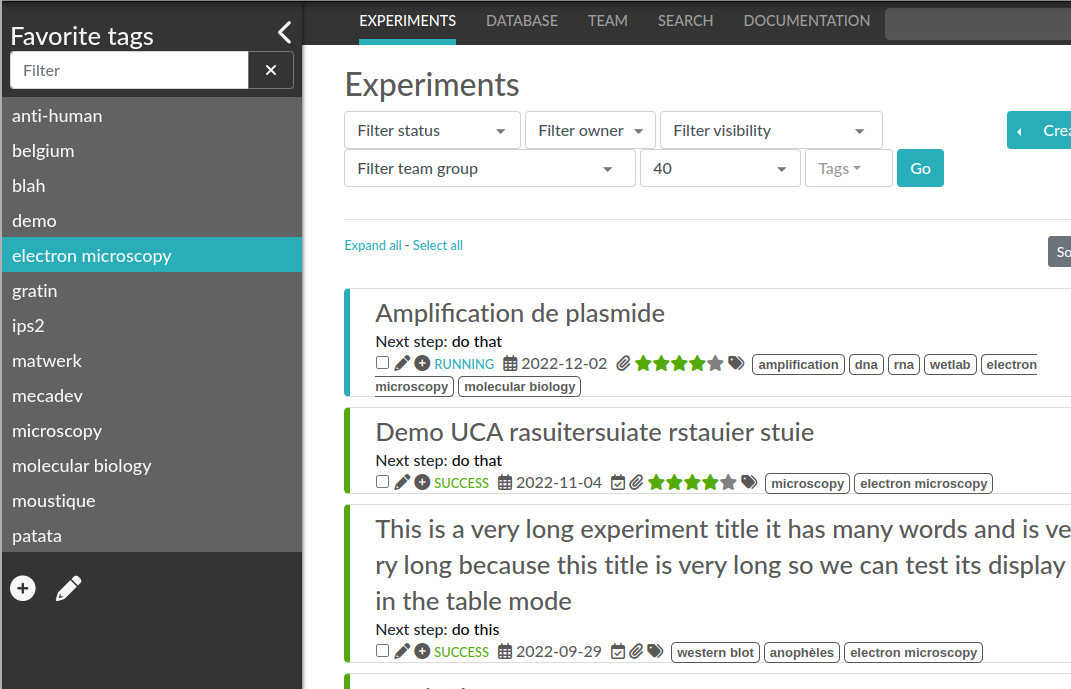
Note that if you use a "Favorite Tag" filter and then create an Experiment, it will be tagged automatically with that Tag.
Using Projects
There is also another way to group Experiments together, that you can use along with Tags. It's using a Resource of Category: Project.
Go to the Admin Panel and create a Resource Category: "Project". Go to the Resources tab and create a new "Project" entry describing a group of Experiments, a project. Go to the Experiments tab and create an Experiment. In the field "Linked Resources", type the name of the project and click on the autocompletion field appearing, and press enter (or click outside). This Experiment is now linked to the project. So you can easily go to the project description from the Experiment, but more importantly, you can from the Project entry, click the "Show related" icon (chainlink) and display all Experiments linked to this project!
Make sure to create Experiments templates that already link to that Project so the link will always be here when the Experiment is created by a User.
Using Categories
Among a Team, Users and Admins can define several Experiments Categories. It is a quick and easy way to group Experiments together.
Sharing with external collaborators
If you want to share your results with an external collaborator, you have a few options:
Option 1: Export and send
This option is pretty straightforward, you export your entry into a PDF or ZIP archive and send this by email or other means to your collaborator.
If course, this option has its limitations, and is not always the best suited approach, but works 100% of the time.
Option 2: Allow anonymous access
It is possible to allow Anonymous access to an eLabFTW installation, but this functionality is disabled by default. The Sysadmin must check this parameter from the Sysconfig Panel:
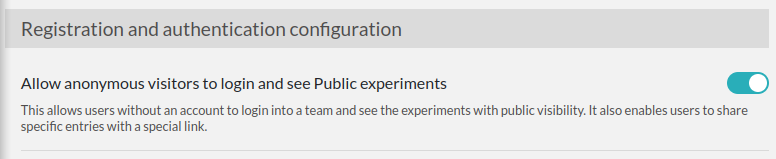
Then, Users will have the possibility to generate a link with an access key in its URL, from the Visibility permissions window of an entry, near the bottom:
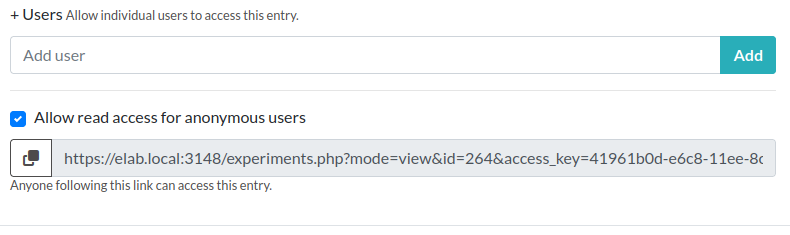
Sharing this link will give read access to the recipient. If the checkbox is unchecked, previously shared links become obsolete. Using this has the advantage that the recipient can follow the evolution of the results over time.
For this feature to work, the instance must be accessible from an external network.
Option 3: Share with a user on the instance
You might want to share some entries with a specific user, group, or team present on the Instance. For that, go to the Permissions section of an entry:
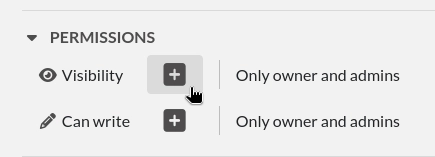
Click the + sign to display a modal window. From there you can for instance select a Team to add to the base permissions:
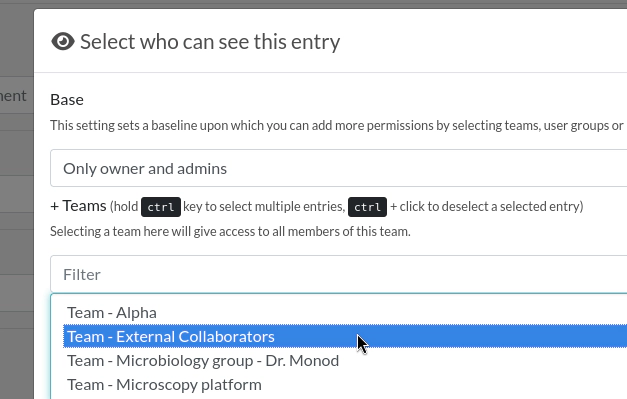
This will add all the members of that Team. If you want to be more precise, you can select a Group, or a single user by typing their name in the section at the bottom:
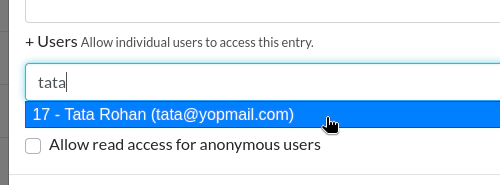
Select the autocompleted user and click "Add".
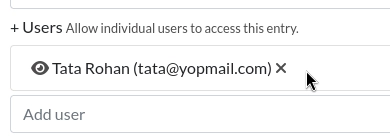
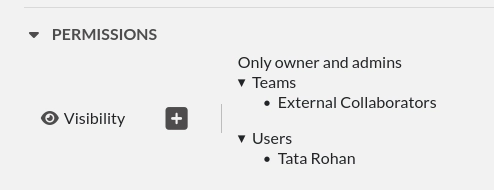
Click "Save" and it will look similar to this now:
You can also do something similar for edition permissions.
Search tips and quirks
Simple search
The simple search field searches the following content of experiments and resources:
- Title
- Main text
- eLabID
The search uses full-text word matching. Search terms are treated as word prefixes, meaning that a term can only match from the beginning of a word.
For example, searching for:
chemwill matchchem,chemicalandchemistry;microwill matchmicroscope;scopewill not matchmicroscope;istrywill not matchchemistry.
The simple search is therefore not a substring search: it cannot find arbitrary sequences of characters located in the middle or at the end of a word.
A substring is simply a sequence of characters that appears anywhere inside a word. For example, scope is a substring of microscope, because the letters scope appear at the end of that word.
This behavior is intentional and is used to improve search performance. Prefix-based full-text searches can use the database full-text index efficiently, whereas arbitrary substring searches generally cannot and would require much more expensive scans of the stored text, especially on installations containing a large number of entries.
When several words are entered, each word is treated as a search token and all tokens must be present in the matching entry.
For example:
- cell culture
will search for entries containing a word beginning with cell and a word beginning with culture.
Other identifiers
The simple search also recognizes an exact custom ID when the search term corresponds to one.
Very short search terms (one or two characters) receive special handling because they cannot normally be used by the full-text index. In that case, eLabFTW also performs a substring search against the title, date, and eLabID fields.